Meccanuity 2017: Keith Way Trophy, Windmills and Wind Turbines. If I Can Do It Anyone Can!
By Chris Instone • Published on Friday 25 November 2016, 3:21pm
Now I can do it so anyone can (wink)...
[1970-pocket-set-windmill-1-.jpg]
https://tims.org.uk/assets/1970-pocket-set-windmill-1-.jpg
width: 288px; height: 510px; border-width: 3px; border-style: solid; margin-left: 230px; margin-right: 230px;
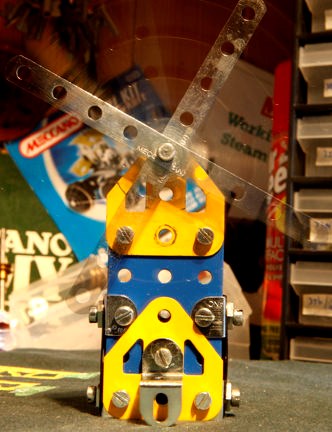
From this 1970's Pocket Meccano set windmill...
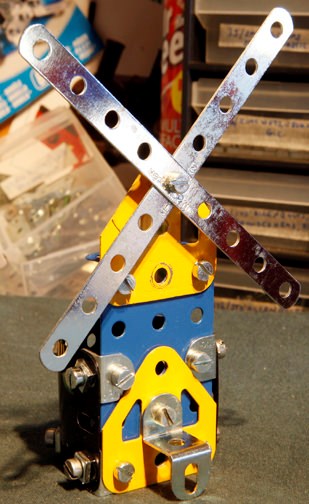
to this 1970's Pocket Meccano windmill, err, well almost. Read on...
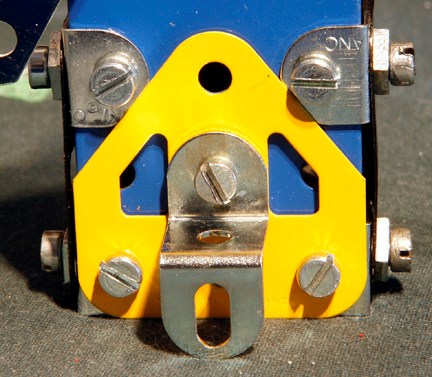
The instructions, or rather, the two images included in the instruction sheet of many models leave a little bit of the build to your imagination, but there is an error. It seems, from the rather obstructed view of the base of the windmill that the bottom angle brackets fit inside the 3 hole x 5 hole flanged plate (that's the blue thingy in the images for those not up on their part numbers and names). Because of the close proximity of the flange (side) of this plate the holes of the angle brackets (two of these right angle parts can be seen near to top of the above photo') do not align with those they are supposed to in the flanged plate. The answer? Fit the angle brackets to the outside of the flanged plate. This does mean that the flat trunnion (yellow triangular (ish) part in the above photo') will not fit flush with the flanged plate and would, when secured to it, become some what deformed. The answer to this is two fold. First, the top angle brackets are also fitted to the outside of the flanged plate. This means the flat trunnion is now level, but there's still a gap beneath it, so place a fishplate underneath to take up the gap, and thus, when the trunnion is secured to the flanged plate it does not get deformed.
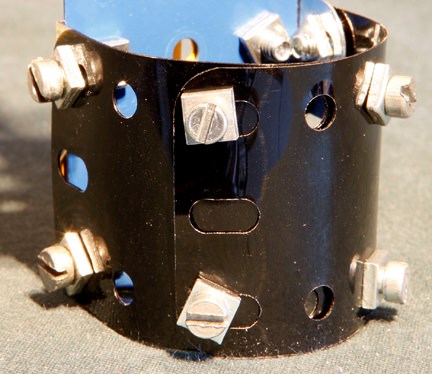
In the images on the instruction sheet you can't see the construction of the flexible plates, that's the two black, in this case, plastic parts curved around to form the base of the windmill, although the images do state that you use two of them. The above photo' shows how I did it, but I did make a few changes. Firstly, the side bolts, on the far left of the model, are shown with the threaded end sticking out of the model. This I didn't like because it looks untidy and it's very awkward to fit the screwdriver into the slot of the bolt head. It's actually worse at the bottom because of the flange of the flanged plate, which prevents any access to the bolt heads if fitted as instructed. The solution is to fit the bolts with the heads showing on the outside of the structure. The second change involved fitting an extra nut to each bolt that goes through the plastic flexible plates. This is done to prevent damage to the flexible plates, which are, in this case, over 40 years old and easy to damage, and would normally be the job of a standard washer. However, there are no washers in a Pocket Meccano set, but there is enough in the way of spare nuts (using all the available nuts in the set by the time the model is completed) to do a good "back up" job.
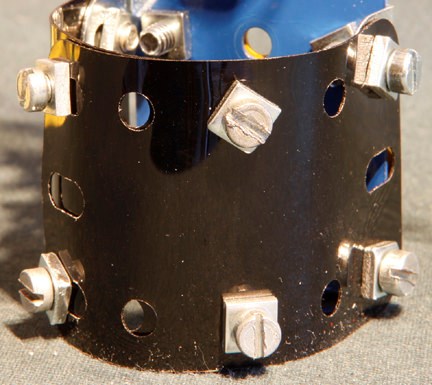
The other side of the rear of the base of the structure
Works too! I think Windy Miller would be happy to work here (wink)
Please note that all the parts included in this build are all included in a Pocket Meccano set.